Tutorials
SkyBlock |
Piggyback |
|
Mermaid |
Enchanted Furnace |
Block Locker |
ChestShop |
Essentials |
Residence |
Useful commands:
/spawn - Takes you to spawn
/sit - Tired of standing? (Ya lazy bum) Then just type /sit and relax a little.
/warp (warpname) - Type /warp list or see the warp room for the warps on the server.
/back - Use this is (when) you die
/afk - Away from keyboard
/list - Who is on the server now
/w (playername) - Whisper to another player
/r - Reply to a whisper from another player
/seen (playername) - See when your friend was on the server last
/sethome (name) - Set a home
/delhome (name) - Delete the sethome you just made
/home (name) - Go to the home you set
/ignore (playername) - Is someone bothering you? Not anymore
/tphere (playername) - Ask someone to tp to you
/tpa (playername) - Ask to tp to another player
/tpaccept - Accept the tp requests
/enderchest - Access to enderchest (Contributor ranks only)
/ec - Same as above (Contributor ranks only)
/craft - Access to a crafting table
/pay (playername) (Amount) - Pay money to another player
/craft - /workbench - /wb - Brings up the crafting table (Contributor ranks only)
/iteminfo - Gives item info and number for any item you hold in your hand
/mail send (playername) (message) - Send mail in chat
* To send a private message to the inbox of a member or staff on the forums (not limited to text like twitter) simply click on the word "inbox" at the top right hand of the forums and then click on "start a new conversation". Works just like email.
SkyBlock
Commands:
Player Commands:
/island help - Shows SkyBlock help menu. This page may not have the very latest list!
ASkyblock accepts the following commands that begin with */island*, */as* or */is*. Commands may not be visible if not allowed by permission.
/island - generates a new island, opens the GUI or teleports the player to their island, home location or the team island
/island help - shows help text
/island go - teleport to your island
/island biomes - open the biomes GUI
/island cp or control panel - shows a GUI with useful commands so players do not have to type
/island expel - Removes a visitor from your island
/island reset or restart - restarts an island. There is a cool down timer and a max limit on this so that players do not abuse it
/island lang - allows player to chose their UI language
/island level - ranks the island
/island level <player> - shows the island rank for another player
/island lock - locks an island so none can enter or teleport into
/island top - shows the Top 10 islands by rank
/island minishop or ms - displays a shop GUI with different items - admins can customize the contents and prices
/island settings - lists the game settings in a read-only panel
/island sethome - sets your island home
/island sethome <number> - sets a numbered home point, up to the max the server allows
/island spawn - teleport to the island-world spawn
/island warps - Lists warps that are available via Welcome Warp Signs
/island warp <name> - warps to a Welcome Warp Sign. The full name does not have to by typed in (just the first few letters)
Team-related Commands
/island invite - Invite a player to join your team. You can only invite one person at a time.
/island accept or reject - Accepts or rejects an invite. If a player has an island already and accepts, the island will be deleted.
/island team - lists info on the team
/island teamchat - enables teams to chat among themselves without bothering others. Must be enabled in config.yml and player must be in a team to see the command. Chats can be spied on by admins.
/island leave - leave the team - returns to spawn
/island kick or remove <name> - only available for the island owner or leader - removes a team member. If the player is online, all their inventory will drop and they will be sent to spawn. If they are offline, they will get a message when they log in that they have been kicked.
/island makeleader <name> - Transfers ownership to a team member. Can only be issued by the leader.
Co-op Commands:
Enables players to help others without having to join their team
/island co-op <player> - Gives a player temporary full access to your island. Notifies other team members and the leader when this happens. Use it wisely.
/island expel <player> - Removes co-op status. Also ejects player from your island.
Welcome Warp Signs
Welcome Warp Signs are an easy way for players to make warps. Each player can generate only one warp. They create a warp by placing a sign with the first line [WELCOME] on it. If the warp creation is successful, that line will become green. If there is a problem, it will become red.
Warps are listed under /island warps and are the player's name. Players can warp by typing /island warp <name of warp>.
To destroy or remove a warp, the player should destroy or remove the sign.
The other lines on the sign can say anything the player wants.
Block Values:
For leveling islands
The player's island is scanned and points added for each eligible block. The total is divided by 100 and rounded down to obtain the island level. Blocks must be actually placed on the island and not inside chests or other storage items and not in the player's inventory to count.
Blocks values follow:
Value 1
COBBLESTONE, ACACIA STAIRS, BIRCH WOOD STAIRS, BED BLOCK, WOOL, CARPET, COBBLESTONE STAIRS, COBBLE WALL, DARK OAK STAIRS, DOUBLE STEP, FENCE, FENCE GATE, GLOWSTONE, GRAVEL, HUGE MUSHROOM 1, HUGE MUSHROOM 2, JACK O LANTERN, JUNGLE WOOD STAIRS, LADDER, LEVER, LOG, LOG 2, NETHERRACK, QUARTZ BLOCK, QUARTZ STAIRS, RAILS, SANDSTONE STAIRS, SIGN POST, STAINED GLASS PANE, SPRUCE WOOD STAIRS, STEP, STONE, STONE BUTTON, THIN GLASS, WALL SIGN, WOOD, WOODEN DOOR, WOOD BUTTON, WOOD DOUBLE STEP, WOOD PLATE, WOOD STAIRS, WOOD STEP, WORKBENCH
2 Value
BOAT, CHEST, CLAY, DIRT, ENDER STONE, GLASS, HARD CLAY, HAY BLOCK, ITEM FRAME, MOSSY COBBLESTONE, NETHER BRICK, NETHER BRICK STAIRS, NETHER FENCE, PAINTING, PISTON BASE, PISTON STICKY BASE, SMOOTH BRICK, SMOOTH STAIRS, SOIL, SOUL SAND, STAINED CLAY, STAINED GLASS, STONE PLATE
5 Value
BOOKSHELF, BRICK STAIRS, BRICK, DIODE, DIODE BLOCK OFF, DIODE BLOCK ON, DISPENSER, DROPPER, FLOWER POT, GRASS, ICE, IRON DOOR BLOCK, IRON FENCE, IRON PLATE, MYCEL, PACKED ICE, TNT, TRAP DOOR
10 Value
BURNING FURNACE, ACTIVATOR RAIL, ANVIL, CAULDRON, DAYLIGHT DETECTOR, DETECTOR RAIL, EXPLOSIVE MINECART, FURNACE, HOPPER, IRON BLOCK, JUKEBOX, LAPIS BLOCK, MINECART, NOTE BLOCK, OBSIDIAN, POWERED MINECART, POWERED RAIL, REDSTONE BLOCK, SPONGE, STORAGE MINECART, TRAPPED CHEST
20 Value
BREWING STAND HOPPER MINECART
100 Value
BEACON
150 Value
DRAGON EGG, EMERALD BLOCK, GOLD BLOCK, ENCHANTMENT TABLE
300 Value
DIAMOND BLOCK
-Back To Top-

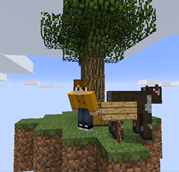
Crouch, click, piggyback!
Ever wanted to CARRY pigs around like a BADASS?! Ever wanted a SLIME as PET?! TIRED of Wheat and Leads?! Your FRIEND doesn't want to come with YOU?!
How to Use
-
1. Search for a mob you want to carry.
-
2. Come close to the mob (at least 5 blocks).
-
3. Crouch and right click on the mob!
If you want to stop carrying the mob or player, you just crouch and right click again.
-Back To Top-
Mermaid
You can now swim and breath under water! Just type /mermaid to toggle on and off
To swim fast, press your sneak button (usually Left Shift).
-Back To Top-
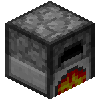
Enchanted Furnace
Efficiency (DIG_SPEED)
Increases smelting speed. Stock is 10 seconds per smelt.
Modified time in seconds is 20/(level + 2).
lvl 1 = 6.7s
lvl 2 = 5s
lvl 3 = 4s
lvl 4 = 3.3s
lvl 5 = 2.9s
Unbreaking (DURABILITY)
Increases smelting time. Stock varies by fuel.
Time = default time * (level / 5 + 1)
Ex. Coal burns for 80 seconds. Unbreaking 1 -> 96 seconds.
Fortune (LOOT_BONUS_BLOCKS)
Adds additional result chances.
lvl 1 = 33% chance
lvl 2 = 25% chance per level
lvl 3+ = 20% chance per level
Silk Touch (SILK_TOUCH)
Furnace remains lit but will preserve remaining burn time when it has nothing to smelt.
Does not save paused time when broken and replaced.
Other Features
As of v1.3, named furnaces will stay named even when broken. This allows users to keep track of which furnace has which enchantments
without forcing them to rename it each time it is moved.
-Back To Top-

BlockLocker
The usage of BlockLocker and Lockette are exactly the same. For players, just hold a sign in your hand, then right click a chest or any lockable block. If you want to lock a door, you may put a sign on the block above or below the door too. You may also SHIFT+RIGHT CLICK the block to prevent it get automatically locked, or you can write [Private] text manually on signs as well. After locking, you may add a second sign on chest/block will add a [More Users] sign so you can add more users to a chest/block. In order to add another user name on a sign, first right-click to select a sign, then enter /lock <line number> <name>.
Commands
Main command is /bl. Aliases contains /lockit, /lockette and /lockettepro.
Edit a sign: /bl <line number> <player> to add a player to the sign.
-Back To Top-
ChestShop
-Back To Top-
Essentials
/workbench or /craft - to have a crafting table without building one (C+ only)
/bal or /money - to check your account balance
/pay - to pay another player for goods or services. Type /pay playersname amount
/afk - away from keyboard (limit 15 minutes for members- no limit for contributors)
/help - displays essentials commands
/ignore - /ignore playername allows you to ignore chat from anyone who bothers you.
/itemdb - Allows players to look up the data attached to the item they are currently holding or look up the data values of a search term.
/list - who's online?
/mail - allows you to send & receive mail. To send: /mail send playername message
/mail clear - to remove messages
/mail sendall message - to send a server wide message to all players
/me - allows you to emote or describe your actions. (example: /me smiles) displays in chat : Teddro smiles
/msg, m, t, whisper, - This allows you to private message another player in chat
/reply, r - this allows you to replay to a private message in chat.
/recipe - displays how to craft items
/seen - allows players to see when another member played last
/enderchest - (C+ only)
/spawn - takes you to spawn
/back - returns you to your death point (get your stuff)
/sethome - set a home point
/home - return to your sethome
/warp - use server warps
/tpa - asks a player if you can teleport to them (/tpa playername)
/tpaccept - accept a /tpa request
/res tp (resname) - teleports you to that res
-Back To Top-
Residence
Quick Tutorial:
2. Use stick to mark the 2 furthest corners of the area you want to res (Lowest corner and highest further corner, forming a cuboid). Right click to select first corner with the stick. Left Click to select the Second corner with the stick.
3. Type /res select cost - To see how much it will cost you to res your selected area.
4. Type /res create (Res Name Here) - Creates your residense.
Congats! You now have a residense!
In Depth Tutorial:
Limit Command and Output Definitions
If you would like to know what the cost per block, max size, max residences, or any other information about residence is, use the following command:
Command |
/res limits |
Would you like to know more?
Field |
Description |
Permissions Group |
Display the group you belong to. This set the available option you will have within residence. |
Can Create Residences |
True/False indicator as to whether or not you may create a residence. |
Max Residences |
Maximum number of residence you may have at any one time. |
Max East/West Size |
Maximum "X" block size you may create a residence at. |
Max North/South Size |
Maximum "Y" block size you may create a residence at. |
Max Up/Down Size |
Maximum "Z" block size you may create a residence at. |
Min/Max Protection Height |
Maximum and minimum height at which residence may be created. There is no Limit. |
Max Subzone Depth |
Maximum layers of subzones you may create within each subzone. |
Can Set Enter/Leave Messages |
Display whether or not you are allowed to set custom Enter/Leave messages for your residence. |
Number of Residences you own |
This is the maximum number of residences you are allowed to make. |
Residence Cost Per Block |
cost per block to create a residence. |
Flag Permissions |
Displays the flag permissions aren't allowed to use. If "none" then you are not limited. |
Creating a Residence
Here you will learn how to select, determine cost, create, and expand a residence.
Define Residence
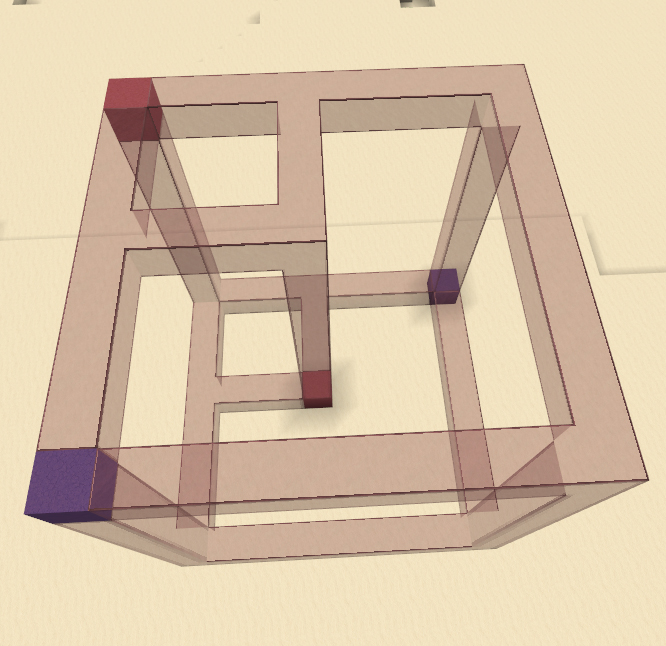
To define a residence, you will select the opposite-most corners of a cuboid of space, like this:
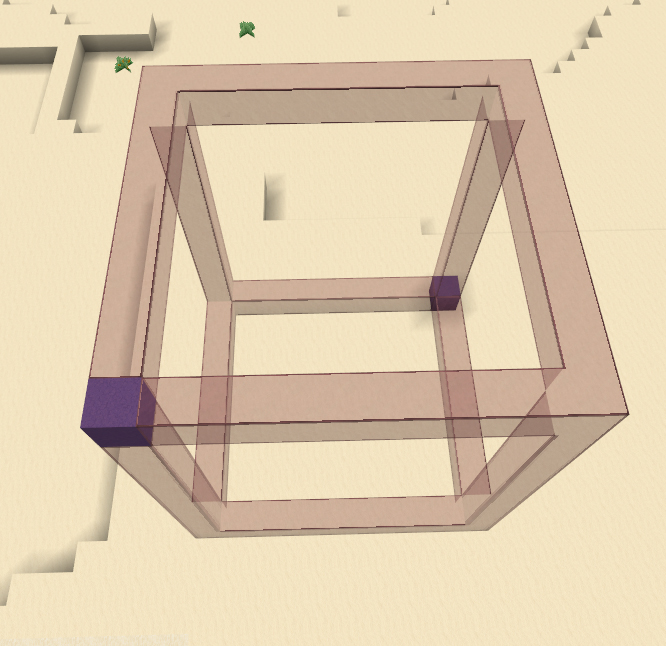
Using a Stick, left click one corner, and right click the opposite. It doesn't matter which you left click and which you right click as long as you do both actions.
Determine Residence Cost
Once your residence area is defined, you will likely want to know how much it will cost to create it. To do this, run the following command.
Command |
/res select cost |
Output will look similar to this:
Selection total size: 1430
Land cost: 29
XSize: 11
YSize: 10
ZSize: 13
Create Residence
Command |
Example |
/res create <resName> |
/res create house |
Running this command will result in output similar to this:
Charged 29 to your Vault account.
Residence Area created, ID main
You have created residence test!
Expand Residence Size
To expand a residence you must select the current residence's physical area, tell it how to expand, and then commit the changes by replacing the old area dimensions with the new ones.
Note: Expanding a residence WILL cost you additional money. The same per-block cost applies.
1. Select the residence's physical area:
Command |
Example |
/res select residence <resName> <areaName> |
/res select residence house main |
"main" is a residence's default areaName, unless you have changed it.
2. Expand the residence.
You can either expand the residence from bedrock to sky, which is really expensive, or just expand it a certain amount of blocks in the direction you're looking.
Command |
Example |
/res select expand ## |
/res select expand 50 |
Additionally, you may elect to expand the residence from bedrock to sky
Command |
Description |
/res select vert |
Expands the selected area from bedrock to sky. WARNING: Very Expensive |
3. Commit changes to residence
Now you can replace the old residence's dimensions with the new one's you've selected:
Command |
Description |
/res select vert |
/res area replace house main |
Section Command Reference
Command |
Description |
/res create <resName> |
Create a residence using the currently selected blocks |
/res select cost |
Display the cost of the current selected blocks |
/res select residence <resName> <areaName> |
Select main physical area of the residence |
/res select expand ## |
Expand the residence in the direction you are looking |
/res select vert |
Expand the selected area from bedrock to sky. EXTREMELY COSTLY-BE SURE |
/res area replace <resName> <areaName> |
Complete the expansion of the residence |
Residence Teleports
A great benefit of having residences (and friends with them!) is the ability to quickly teleport around.
Teleporting to a Residence
To teleport to a residence we will use the tp flag.
Command |
Example |
/res tp <resName> |
/res tp test |
Residence Teleport Location
By default the /res tp command takes you "near" the specified residence. This could be in a lake nearby, under the house, or, if you're in the nether, on TOP of the bedrock on the top of the nether.
This can lead to frustrating and inconvenient experiences.
To prevent this, we need to do a tpset inside the residence while standing on the spot you want people to teleport into.
Command |
/res tpset |
Note: It is worth noting that residence will behave somewhat abnormally if the player is in confined locations when /tpset is run. If you are standing on a half-slab and there isn't much room above you, you may end up teleporting "near" that location again. It's best to be standing on a flat block.
Stuck in the Ground!
Sometimes after teleporting to a residence, you may find yourself stuck in a floor, refrigerator, or, (hello) , someone's bed.
We can fix that, too!
Command |
/res unstuck |
Please note that this will only work if you're currently IN a residence. Won't help if you end up on top of The Nether.
Residence Info
Command |
Example |
/res list |
Check and see which residences you own |
/res list # |
List residences by page number (if you have more than one page of listings |
/res info |
Check permissions/details of the residence you are currently in |
/res info <resName> |
Check permissions/details of the specified residence |
Note: You may also hit the ground within a residence with a piece of string.
Permission Flags
One of the biggest advantages to having a residence is the ability to set granular permissions for the area itself, and for individual players. How is this done?
Set permissions for the entire residence
Flags set for the residence are in effect for every player that enters into it, including the owner. These residence-wide flags can be overridden using player-set flags, which we will get into later.
Please Note: Residence names are always case sensitive.
Command |
Example |
/res set <resName> <flag> <true/false> |
/res set house tp false |
This will prevent all players (including the owner/creator) from using "/res tp" to teleport to the residence.
Set permissions for individual players
So, if you followed the exmaple above, then you've disabled the ability for anyone to tp to your residence. So, how do you enable teleporting there for yourself?
We use the pset condition!
Command |
Example |
/res pset <resName> <playerName> <flag> <true/false> |
/res pset house Teddro tp true |
Now Teddro can tp to that residence, but nobody else can!
Residence Flags
For flag values, usually true allows the action, and false denys the action.
Flag |
Description |
build |
allows or denys building |
use |
allows or denys use of doors, lever, buttons, etc... |
move |
allows or denys movement in the residence. |
container |
allows or denys use of furnaces, chests, dispensers, etc... |
trusted |
Gives build, use, move, container and tp flags |
place |
allows or denys only placement of blocks, overrides the build flag. |
destroy |
allows or denys only destruction of blocks, overrides the build flag. |
pvp |
allow or deny pvp in the residence |
tp |
allow or disallow teleporting to the residence. |
subzone |
allow a player to make subzones in the residence. |
monsters |
allows or denys monster spawns |
animals |
allows or denys animal spawns. |
healing |
setting to true makes the residence heal its occupants. |
tnt |
allow or deny tnt explosions |
creeper |
allow or deny creeper explosions |
ignite |
allows or denys fire ignition. |
firespread |
allows or denys fire spread. |
bucket |
allow or deny bucket use. |
flow |
allows or denys liquid flow. |
lavaflow |
allows or denys lava flow, overrides flow |
waterflow |
allows or denys water flow, overrides flow |
damage |
allows or denys all entity damage within the residence. |
piston |
allow or deny pistons from pushing or pulling blocks in the residence. |
hidden |
hides residence from list or listall commands. |
cake |
allows or denys players to eat cake |
lever |
allows or denys players to use levers |
button |
allows or denys players to use buttons |
diode |
allows or denys players to use redstone repeaters |
door |
allows or denys players to use doors and trapdoors |
table |
allows or denys players to use workbenches |
enchant |
allows or denys players to use enchanting tables |
brew |
allows or denys players to use brewing stands |
bed |
allows or denys players to use beds |
pressure |
allows or denys players to use pressure plates |
note |
allows or denys players to use note blocks |
redstone |
Gives lever, diode, button, pressure, note flags |
craft |
Gives table, enchant, brew flags |
burn |
allows or denys Mob combustion in residences |
Copying Residence Permissions
Once you have a residence set with the permissions you like, it can be a pain to have to type all of those flags, messages, and material blacklists you have set into a new residence.
Fortunately the plugin author gave us the mirror command.
Command |
Example |
/res mirror <sourceResName> <destinationResName> |
/res mirrior house house2 |
Subzones
Subzones are used for creating a small area within an existing residence that may have a different permission, members, and even it's own TP location.
The corners of the desired cube of space within the residence must be selected with a stick just like the original residence was, like this:
Create Subzone
Command |
Example |
/res subzone <resName> <subzoneName> |
/res subzone house boat |
You now have a subzone!
Subzones and Flags
To apply permissions to the new subzone, you will use the same syntax as previous set and pset commands, but now you will reference the residence a little differently.
Command |
Example |
/res subzone <resName.subzoneName> <flag> <true/false> |
/res subzone house.boat tp true |
Now, to actually teleport to that subzone:
Command |
/res tp house.boat |
Residence Market
Since you know how to work with subzones now, you can give your friends or even strangers room in your place without having to worry about them having access to your main residence area. Why stop there, though? Maybe you'd like to go into the real estate business and start selling apartments, houses, or swaths of land for people to dwell in?
I'd like to introduce you to the Market system.
Using the syntax I'll give below, you can sell, buy, show info for, and stop selling a residence, or subzone of a residence!
Flag |
Description |
Syntax |
info |
Get economy info on residence |
/res market info <resName> |
list |
Lists rentable and for sale residences. |
/res market list |
sell |
Sell a residence |
/res market sell <resName // resName.subzoneName> <amount> |
buy |
Buy a residence |
/res market buy <resName // resName.subzoneName> |
unsell |
Stops selling a residence |
/res market unsell <resName // resName.subzoneName> |
Additional Functionality
There are quite a few commands not listed in this guide, not all will be listed here. Nevertheless, this section will cover a few sets of commands not handled before. A side note: Some of these commands can, under certain conditions, be used without the residence name to apply to the zone you are currently located in. Others, however, cannot. Because of this, only the full versions are provided here.
Physical Areas and Subzones
Command |
Description |
/res area list <resName> |
Short list of the main areas of a residence. There is usually only 1. |
/res area listall <resName> |
A more detailed list of the main areas of a residence. This list includes corner coordinates and total block size of the area. |
/res sublist <resName> |
List of all subzones in a main residence area. |
All of these commands can be run against subzones of a residence, such as house.boat above.
Rename or Delete
You may rename or delete any or all parts of a residence.
Command |
Description |
/res rename <resName> <newResName> |
Renames an existing residence. |
/res renamearea <resName> <areaName> <newAreaName> |
Rename the physical area of a residence. Default name is "main". There is no real point to this, aside from customization. |
/res area remove <resName> <areaName> |
Removes area from the residence. |
/res remove <resName> |
Delete the residence. |
/res remove <resName.subzoneName> |
Delete the specified subzone. |
There is NO refund when you delete a residence.
Enter and Leave Messages
These are the messages you see when entering and exiting a residence area.
Command |
Description |
/res message <resName> <enter/leave> <message text> |
Sets the designated message type and text for the specified residence. |
/res message <enter/leave> <message text> |
Sets the message text for the residence or subzone you are currently in. |
/res message <resName> remove <enter/leave> |
Removes the enter/leave text for the specified residence. |
/res message remove [enter/leave] |
Removes the message text for the residence or subzone you are currently in. |
%player, %residence, and %owner may be used in the message for additional customization.
Give Residence to Another Player
Command |
Description |
/res give [residence] [player] |
Transfers ownership of the residence to the player. Player must be online. |
Blacklist/Ignorelist
You may prevent and/or allow certain blocks from being used in a residence by adding them to a blacklist or ignorelist.
Note: I have not messed with this functionality at all, so someone may want to correct it later.
Command |
Description |
/res lset <ResidenceName> <blacklist/ignorelist> <material> |
Adds or Removes a material from the residence's blacklist or ignorelist. |
/res lset <ResidenceName> info |
List the residence's blacklist and ignorelist. |
-Back To Top-